This post happened entirely out of necessity. I've been lazy about baking lately, and haven't felt inspired to write a clever post. Then, while idly leafing through my ad hoc at home cookbook one evening, the urge struck to make TK's whole bass in a salt crust. TK's recipe instructs you to bury the fish in so much salt that your blood pressure rises just reading the ingredient list. In addition to the extravagant amount of salt, the recipe calls for 8 egg whites. This, of course, leaves 8 lonely, unused egg yolks. Strangely, while I felt no guilt about wasting a whole box of salt on a silly fish, I did feel a twinge of guilt about throwing all those cheerful looking yolks down the drain. What to do with a big bowl of egg yolks? Custard custard custard! And the creme de la creme of custard just so happens to be crème brûlée.
I figured I'd whip out a few of these babies, serve them to the fam, and be done with it. No post necessary... WRONG! No sooner had I caramelized my first custard and cracked its sugar shell when I knew I would have to post this recipe. With one gentle tap of my spoon, the thin, glassy brûlée snapped into sugar shards, revealing the creamiest custard I'd ever laid eyes on. The first bite was cool, sweet, and outrageously luxurious - the silk negligee of the dessert world. You might save your silk negligee for special occasions, folded neatly between tissue paper and tucked away in the back of your drawer... But there was no way I could let this recipe languish between the dusty pages of some old cook book, waiting for someone's anniversary or bridal shower. Onto the Internet we go! Gasp! (Keep your drawers on. It's just dessert. No photos of unmentionables here). Please try this recipe. It's super easy, and even if you're not a food freak who has every kitchen utensil known to man, including a mini-blow torch, you can still get the brûléed effect by user the broiler in your oven.
Ingredients
3 c. heavy cream
6 large egg yolks
1T vanilla
1/3 c. sugar, plus extra for the brûléed topping
Preheat the oven to 300. Combine the cream and vanilla in a medium saucepan, and set the pan over medium-high heat. Cook until small bubbles form at the edges of the pan, about five minutes. Turn off the heat, cover the pan, and let it stand for fifteen minutes while you whisk the eggs. Heat a kettle of water to boiling for a water bath.
In a large bowl, whisk the eggs and the 1/3 c. sugar until thick and pale yellow, about 2-3 minutes. The cream mixture should have cooled a bit at this point, but you should still be careful not to curdle the eggs in this next step: slowly drizzle the warm cream into the egg mixture, continuing to whisk the eggs as you add the cream. If you add the cream too quickly you will risk cooking/curdling the eggs, so take your time!
Divide the egg-cream mixture evenly between six 6oz ramekins, or between nine 4oz ramekins. Place the ramekins into a roasting pan or glass baking dish and carefully pour the boiling water into the pan/dish until it reaches halfway up the sides of the ramekins (this is a water bath). Carefully transfer the pan(s) with the custards into the oven, and bake until the custards are just set. The centers should still jiggle a bit when you jostle the ramekins. 40 minutes should do the trick.
Remove the custards from the oven and let them cool in the water bath. Lift the cooled ramekins out of their bath, and stick them in the fridge to chill for 4 hours, or overnight.
To serve, sprinkle about 1t sugar on the top of each custard. Using a kitchen torch, hold the flame 2-3 inches above the sugared surface and slowly sweep it back and forth until the sugar bubbles and caramelizes. Alternatively, preheat the broiler and move the oven rack to the top rung (within one inch of the heating element. If you can't get it that close, just broil it for a bit longer). Stick the sugared custards under the hot broiler for 20-30 seconds - until golden brown. Allow the caramelized surface to cool and harden for that satisfying *snap* as you dig in!
...
Tuesday, September 14, 2010
Thursday, August 26, 2010
Mystery Mint Chip Ice Cream
I do weird things with food when I'm bored... although, some would argue I do weird things with food all the time. Just earlier today I (regrettably) found myself slathering almond butter on a spoonful of peanut butter chocolate ice cream. It was 107 degrees outside, and the only edible thing in my freezer was a meager spoonful of ice cream, so I'm not sure why I felt the need to smother that final, cold, precious bite with sticky warm goo. It must be my insatiable quest for adventure and experimentation!
The lack of ice cream in my freezer on a day when I so desperately needed ice cream inspired me to action- as did the article I had just read in this month's Bon Appetit about infusing cocktails with herbs. Our garden is full of herbs! I could infuse my ice cream with herbs! Unfortunately, due to a laissez-faire gardening regime, our herb patch has grown into a monstrous thicket. The labels marking the once-neat rows of herbs have long-since been engulfed by vines, fronds, and giant spider webs. I managed to recognize the basil, rosemary, and curry plants by sight (and smell!), but I doubted anyone in my household would embrace savory ice cream, and never curried ice cream (except my bf who puts curry in everything! I don't want to encourage that haha).
However, I vaguely remembered my mom mentioning that she had planted some different types of mint in lieu of the usual peppermint. Something about chocolate mint or pineapple mint...? Bingo! What better treat on a hot day than a cool scoop of mint chip?
I traipsed through the herb jungle, dodging gigantic arachnids, ducking spiky stalks, and squinting through the leaves in search of labels, to no avail. None of the plants remotely resembled any mint I'd ever seen. I crushed a few stems between my fingers to see if I could detect a whiff of sharp, minty perfume, but the surrounding foliage failed to produce that familiar fresh scent. One towering plant, however, did smell rather nice. It wasn't too earthy, like rosemary, or too peppery, like basil, and it didn't overpower my nose like the curry. I plucked a fuzzy leaf and inhaled... it had a mild, sweet scent... And did I detect a hint of mint? Sure, why not?
Mint? Poison Oak? Let's eat it and find out!
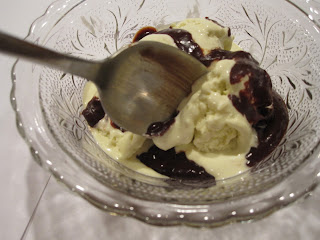
I figured if the plant was in the herb patch, it probably wasn't toxic, whatever it was (I've since learned that at least one species of mint, the pennyroyal, IS toxic if ingested, but what dingbat would plant a toxic variety of mint in an edible garden? Hm.... maybe the same type of dingbat who infuses ice cream with random leaves she discovers sprouting up between her tomato bushes...). And so, mystery mint chip was born! The curious herb had such a delicate aroma that I nixed bittersweet chips in favor of the milder flavor of white chocolate. I wanted this bashful plant to have a leading role in my concoction! (although I wasn't above a drizzle of homemade dark chocolate sauce on my own finished scoop).
The resulting ice cream definitely had a robust minty kick, tempered by the buttery shards of white chocolate folded into the custard. Based on a Google-image search of different mint varieties (and the fact that I haven't yet sickened and died), I think I may have used chocolate-mint after all. Phew!
Ingredients
3 cups of fresh mint leaves, rinsed and packed (I used chocolate-mint, I think...)
1 c. whole milk
2 c. heavy cream
2/3 c. sugar
pinch of salt
6 egg yolks
two chocolate bars (I used two 3.5oz bars of Lindt white chocolate)
Put the chocolate bars in the fridge so they remain cold, unless you're lucky enough to have air conditioning. In a medium saucepan, combine the mint, milk, and one cup of the cream. Heat the mixture over medium heat until the cream is scalded (bubbles will begin to form at the edges of the pan). Do not let the cream-mixture boil. Remove the pan from heat, cover, and steep for 30 minutes.
Reheat the mixture until the cream is scalded again, remove from heat, cover, and steep an additional 15 minutes. Meanwhile, whisk the six yolks together in a small bowl, and set aside.
Strain the mint out of the cream mixture, and return the cream to the saucepan. Use a spatula or fork to press any remaining cream out of the mint and into the pan.
Add the sugar, and stir over medium heat until the sugar has dissolved. Remove from heat. Using a ladle or big spoon, drizzle the hot cream mixture into the egg yolks, whisking the yolks constantly to prevent curdling. Continue ladling cream into the yolks (tempering) until they are hot, but not cooked. Return the yolky cream (pre-custard!) to the saucepan. Stirring constantly, cook the custard over low heat until it thickens enough to coat the spatula. Be very careful not to let the custard get to hot or disaster will befall you in the form of curdled custard. As soon as it starts to thicken, take it off the heat! You can always put it back if it's not thick enough. The process will take between 5 and 10 minutes.
When you're custard has thickened, pour it through a sieve into a separate bowl, and stir in the remaining cup of heavy whipping cream. Stick the whole shebang in the fridge until thoroughly chilled, about 2 hours (or if you're impatient and you have a big empty freezer, you can put it in the freezer to speed things up. Stir it every five minutes or so until cold).
While the custard chills, use a big sharp knife to shave the chocolate bars. The goal is to make chocolate shards that will melt in your mouth, instead of big chunks that will freeze into gravel and ruin the consistency of your hard earned treat. Just slide the knife firmly against the edge of the chocolate bar, and little shavings should just pop off!
When the custard is completely cold, pour it into your ice cream maker and freeze according to the manufacturer's directions. Add the chocolate in the last ten minutes of freeze-time. I do not recommend adding almond butter.
Sunday, August 22, 2010
Chocolate Meringue Cake
This recipe gets its name from the crisp-chewy meringue (studded with toasted hazelnuts and pockets of gooey chocolate... mmm) that crowns the chocolate souffle cake beneath.
When my mom requested that I make this recipe for her birthday, I was not thrilled about it. Up to that point, my contact with meringue had been mostly limited to soggy pie topping and those stiff little cookies resembling pastel ping pong balls (and tasting no better). In my book, meringue had a bad rap as the "light" alternative to my favorite accompaniment (luxurious mountains of sweetened whipped cream!). Why top a delicious chocolate cake with a wispy pile of over sweetened egg-whites when you can just as easily serve it with a dollop of luscious whipped cream?
Despite my misgivings, I went along with the recipe, grumbling throughout the sticky process... but just one bite proved me wrong. Though toothache sweet, the meringue oozed with chunks of dark chocolate and paired perfectly with the rich cake and earthy nuts.
And so began my turbulent, love-hate relationship with meringue. Sometimes, in my quest for the next ethereal meringue delicacy, I beat my whites into a froth only to have them collapse, wet and weeping. Other times, my meringue whips up as soft and sweet as cotton candy, and I fall in love all over again. Worst are the recipes resulting in those cratered wafers that shatter into shards and sugar-dust at the slightest provocation. But this recipe is tried and true. When I want that meringue magic, this is where I turn. What fun to ladle those soft, shimmering layers onto my crackling cake! How glamorous to dress my dessert in silken folds, laden with nuts and chocolate! The voluptuous gown of meringue is quite extravagant and fanciful.
If you want to impress your friends, show up to the party with this little lady in tow (the cake, not me! haha).
Ingredients
10T. unsalted butter, plus a little extra for the pan
1c. hazelnuts
A sprinkle of flour for the pan
3/4c. light brown sugar
6 large eggs, separated
4 large egg whites
12oz. bittersweet chocolate chips, melted and cooled
4oz. bittersweet chocolate bar, roughly chopped
1T. vanilla
1T rum (optional)
pinch of salt
1T. cornstarch
1/4t. cream of tartar
1c. superfine sugar (regular granulated will do just fine though)
Preheat the oven to 350. Butter a 9in springform pan, and sprinkle it with flour. Tap out the excess flour. Spread the hazelnuts in a single layer on a rimmed baking sheet, and toast them in the oven until your kitchen smells wonderful, about 10 minutes. Remove them from the oven and rub them vigorously in a dish towel to remove the skins (don't worry if some of the skin sticks around). Allow the nuts to cool, then roughly chop them and combine them with the 4oz chopped chocolate bar. Set aside.
To make the cake, cream the butter and brown sugar in a large bowl until pale and fluffy. Add the 6 egg yolks one at a time, beating well after each addition. Drizzle in the cooled, melted chocolate, the vanilla, and the rum, and beat until well-mixed. Set the batter aside.
In a medium bowl, beat the pinch of salt with the 6 egg whites on high speed until soft peaks form (use a CLEAN whisk! If you get even a drop of batter, or even water into your egg whites, they won't whip well). This will take about 2 min. Stir 1/3 of the egg whites into the chocolate batter, then gently fold the remaining beaten egg whites into the batter until just combined (don't over-mix!). Pour the batter into the springform pan, and bake 25 minutes.
Meanwhile, prepare the meringue. Beat the remaining 4 egg whites and the cream of tartar on high speed (again, clean beaters, clean bowl = important) until frothy. With the mixer running, add the cup of sugar in a slow stream, and then continue beating until stiff peaks form, about 8 minutes. Stir the cornstarch into the chocolate-hazelnut mixture, and then fold the chocolate and hazelnuts into the meringue.
Remove the cake from the oven, and spread the meringue mixture over the top of the cake. Pop it back in the oven and bake until the meringue is lightly browned, crisp, and crackling, 25-30 minutes.
Let the cake stand at least 10 minutes before unmolding, and allow it to cool for 30 minutes before slicing and serving.
Monday, August 9, 2010
Tomato Tarte Tatin
"Add heavy whipping cream to that list."
"What for?"
"The tomato tart."
"Whipping cream and tomatoes?"
"It's for dessert."
"It's a dessert?"
"Yes, it's a dessert."
"So, it's sweet?"
"Yes, lots of sugar. There's a caramel syrup."
"Caramel and tomatoes... I don't know about that. What do you serve it with?"
"Whipped cream, of course! It's a tart!"
"Aren't you making a side dish for the salmon?"
"No, it's a dessert."
"Well, I think that sounds weird."
And so went the conversation as I explained the tomato tarte tatin to my mom as she made her grocery list for our dinner. I'm sure she secretly put chocolate ice cream on the list too, in case the tomato tart indeed tasted weird. I've said it before and I'll say it again, oh ye of little faith! When have my oddball creations failed you? Did we throw away my Avocado Bread? Was there a single crumb remaining of my Chocolate Chocolate Mayonnaise Cake? When eyebrows raised as I painted balloons with white chocolate, did I not deliver on my promise of delicious panna cotta Easter eggs?
Of course, if forced to choose between no dessert and weird dessert, my family will always choose weird dessert. So with grudging approval, I embarked on my tomato tarte tatin. Given that a tomato really is a fruit anyways, and the recipe appeared in Bon Appetit, I was pretty confident that the dessert would be edible, and probably delicious. Bon Appetit surely wouldn't devote an entire full-color page to a dessert that tasted like Hunt's on puff pastry! The photo was what caught my eye in the first place- it showcased dark red fruits nestled in glossy pools of their own caramelized juices, appearing to be exotic plums on a bed of golden pastry. I was surprised and excited to discover they were not plums, but plum tomatoes!
For some reason, I am endlessly delighted by even the smallest of coincidences. Perhaps because I'm convinced there is no underlying theme to the ebb and flow of life, I've developed the notion that a happy coincidence should be savored. You never know what will happen next time! Morbid and exciting at the same time I suppose... Anyways, when I saw the recipe for tomato tarte tatin, my eyes lit up. Our garden had recently sprouted a ridiculous thicket of tomato bushes. What a coincidence!
One could certainly argue that it wasn't really much of a coincidence... after all, we did plant those tomatoes in June for the express purpose of cooking and eating... but those spindly little plants could have succumbed to blight, been eaten by the army of squirrels camped in our yard, died from our frequent forgetfulness with the watering, or generally failed to flower and flourish. Bon Appetit could have focused on cucumbers! Instead, bushels of fat tomatoes had taken over the entire vegetable patch, rudely intruding into the space reserved for zucchini and peppers and burying the basil under gigantic fuzzy fronds. And Bon Appetit printed a recipe for tomato tarte tatin. A happy coincidence, I say.
The avant garde tart wowed the crowd and the skeptics were skewered again.
It tasted similar to a plum tart, but with an interesting tomato flavor that would have been hard to place had no one been the wiser. The recipe called for plum tomatoes, but my bounty included plum, cherry, and heirloom so I used all three. Served hot, dripping with tangy tomato-caramel, and smothered with sugared whipped cream, this weird dessert was irresistible.
Ingredients for the Tarte Tatin
1 3/4 lbs plum tomatoes
3T. softened butter
3/4c. sugar
1t. vanilla
1 sheet of frozen puff pastry, thawed (I know, using frozen pastry is cheating, but making puff pastry is way too much effort and your puff pastry likely won't compare to the frozen kind, unless you're a professional pastry chef)
Whipped Cream Ingredients
3/4c. heavy whipping cream
1/2t. vanilla
2T granulated sugar
Bring a large pot of water to boil and prepare a large bowl of ice water. Cut shallow cross-hatched slits in the bottom of each tomato, and drop them in the boiling water four at a time. Leave the tomatoes in the boiling water until the skin begins to peel away from the slits, 15-30 seconds. Use a slotted spoon to remove the tomatoes and plunge them immediately into the ice bath to stop the cooking. Repeat with the remaining tomatoes, in batches of four. Peel the tomatoes, discard the skins, and cut each in half crosswise.
Spread the softened butter over the bottom of a 9 inch cast iron skillet (or other ovenproof pan) and sprinkle the 3/4c. sugar over the butter. Arrange the tomatoes, cut side up, over the sugar and butter. Fill the skillet completely, nestling the tomatoes close together.
Place the skillet over medium heat and cook until the butter and sugar reduce to a thick amber syrup, about 25 minutes. Watch the pan carefully and use a spatula to gently shift the tomatoes, and do not allow the tomatoes or the syrup to blacken. While the tomatoes cook, preheat the oven to 425.
Remove the skillet from the heat, and drizzle the teaspoon of vanilla over the tomatoes. Top with the pastry, and use a knife to tuck the edges of the pastry around the tomatoes. Place the skillet in the oven and bake until the puff pastry rises and becomes a deep golden color, about 24 minutes.
Cool the tart in the skillet for ten minutes, then loosen the edges with a knife. Place a large platter over the skillet, and using oven mitts so you don't sear your hands, hold the platter to the skillet and flip the whole thing over. Carefully lift off the skillet, and arrange any tomatoes that have slipped out of place. Let the tart cool slightly while you make the whipped cream.
For the whipped cream, beat the cream on high speed until soft peaks form. Add the vanilla and sugar, and continue beating on low speed for a few more seconds, just to combine the sugar and vanilla with the cream.
Serve each bejeweled wedge of tart with a fat dollop of sugared cream.
Monday, July 12, 2010
Mascarpone Cheesecake
I almost called this post "High Maintenance Cheesecake," but then I figured no one would make it because it would sound like too much work. People, sometimes the good things in life take a little extra work! Yes, you have to go out and find some semi-exotic ingredients (mascarpone and creme fraiche). Yes, you need to buy the expensive, delicious brand of shortbread cookies instead of the crappy ones to make the crust. And yes, you either need a food processor, or a big kitchen mallet and a lot of patience to pulverize your expensive cookies into crumbs, but you will be rewarded for your efforts with the creamiest, richest, most luscious cheesecake you have ever eaten.
It's kind of the same with high maintenance people, right? Right? At least, that is my new motto after realizing that I might be a more high maintenance person than I thought. I like to think of myself as pretty laid back, but when I proclaimed this to my bf (an otherwise very polite and considerate person) he guffawed in my face without a shred of restraint. "You? Ha. You may not be 'high maintenance' but you are DEFINITELY not low maintenance."
News to me!!!! I championed my cause for an hour or so, and finally convinced him that maybe he was defining "high maintenance" differently than me. Satisfied with my position in the debate, I turned my attention to the cheesecake..... and was promptly put in my place...
Things were going swimmingly. The shortbread crumbs whirled in the food processor, the oven glowed, and the eggs and cheese waited patiently to be elevated to dessert royalty. I pressed the crust into the pan, popped it in the oven... and ten minutes later shouted a stream of expletives that filled up my cuss quota for the month. My crust had baked to a slightly darker shade of brown than the coveted golden I was going for!
I sniffed it. "&*%$# Goddammit!" I detected a hint of that hated burned smell. I sighed and dumped the crust into the sink. As the cold sink-water soggified my brown crust and sizzled against the hot pan, I realized that maybe, just maybe, I wasn't so laid back. Would a laid back person freak out because the crust of their cheesecake was the wrong shade of brown? Hmm... I hate being wrong, but I do know when to concede defeat and when to battle on, and I wasn't done with this cheesecake just yet! Some things are worth the effort (right??).
So, pajama-clad and batter-splattered, I headed to Walgreen's with the hope that they carried shortbread cookies so I could start over. It seemed that the world was determined to teach me a lesson for being such an irrational perfectionist. My faulty car alarm began to sound the second I touched the car door, and refused to turn off. The clerk at Walgreen's didn't speak English and directed me to the tampon aisle. When I finally found the shortbread, I hastily grabbed it, which caused the entire towering stack (apparently not too many people purchase shortbread at Walgreens) to catapult into the aisle in a rain of red-checkered boxes. As I approached the checkout counter with my wares, the checkout clerk silently raised an eyebrow (that's what you get for buying four boxes of cookies from a drugstore at night, alone, and in a disheveled state). I paid for the cookies, hurried to my car (lights flashing, horn blaring), and began at square one. I had learned my lesson...
Back at home, I set the oven at a lower temperature so I wouldn't have to throw away a second crust (what, did you think I was going to say I had learned to be laid back and accept a less than perfect dessert? Not gonna happen). This time, the crust, and the cheesecake, turned out beautifully.
We devoured our oversized slices of perfect, creamy, hard-earned cheesecake, and the exchange of "mmmmm's" said it all: some things definitely are worth a little extra patience and effort! (here's to hoping I'm the human equivalent of cheesecake... haha...ha?)
Crust Ingredients
1 1/2 c. crumbs from crushed shortbread cookies (Pepperidge Farm Chessmen work well)
3T. sugar
1/4 c. melted butter
Preheat the oven to 400. Combine the shortbread crumbs, butter, and sugar until evenly moistened. Pour the mixture into a 9-in springform pan, and press it evenly onto the bottom and up the sides. Bake until golden (so very important), about 5-10 minutes. Mine was irreparably charred (aka slightly too brown) after 10 minutes, so check at 5. Let the crust cool while you make the cheesecake batter.
Cheesecake
2 8oz bricks of cream cheese
2 8oz tubs of mascarpone
1/2 c. creme fraiche
3T. flour
1/4 t. salt
1 1/4 c. sugar
1T. vanilla
3 eggs
Topping
1c. creme fraice
1/4 c. sugar
1t. vanilla
Turn the oven temp down to 325. In a large bowl, combine the cream cheese, mascarpone, flour and salt. Beat until fluffy and well-mixed. Add the sugar, creme fraiche, and vanilla, and beat until well-mixed. Scrape down the sides and add the eggs, one at a time, beating well after each addition. Scrape down the sides of the bowl with a spatula between each egg, to ensure even incorporation. Pour the filling into the crust and bake 50-60 min.
While the cheesecake bakes, make the topping by mixing together all of the topping ingredients in a small bowl. 5 minutes before the cheesecake is done, take it out of the oven, pour the topping onto it, and return it to the oven to finish cooking. When the cheesecake is done, it should be slightly golden, and should jiggle in the center. Turn off the oven and let the cheesecake cool in the oven with the door ajar. When completely cool, cover the cheesecake and chill it overnight before serving.
If this were a Martha Stewart recipe, it would tell you in great detail how to cut your cheesecake into clean, pretty slices using a thin knife and hot water, but I'm not THAT much of a perfectionist. Hell, I'll eat the cake out of the pan.
Tuesday, June 22, 2010
Mississippi Mud Pie
So, I lied. I did not post any of the delicious desserts I made as promised last time, but it is not my fault! I have discovered an evil greater than that of hot chocolate chip cookies calling your name straight from the oven: the bar. I'm not talking about lemon bars, or cookie bars, or yummy blackberry pie bars, I'm talking about the big, ugly, California Bar Exam. It has taken over my life! I have not even peeked under the cover of a cookbook for weeks. Luckily, my equally food obsessed friend (you know who you are) managed to (unintentionally) guilt trip me into posting this recipe today. If she can go cheese tasting at Trader Joe's, and can manage to bake from her Cowgirl Cookbook while studying for the bar, then I can at least write about one of the desserts that I promised in my ice cream sandwiches blog post - the one I still reminisce about while I'm eating my preservative-laced, non-homemade (I'm so spoiled!) pepperidge farm cookies in the wasteland of bar study: Mississippi Mud Pie.
This will be a short post, since nearly everything I remember about making the mud pie has been pushed out of my brain and replaced with contracts, property, and torts (not tortes, haha I wish! I'd ace that test). I do remember, however, that this was one of the most delicious custard pies I've ever had or made. Picture creamy, dark chocolate filling, nestled in a crumbly-sweet pate sucree (sorry, I don't know how to add the funny little accents to the "a" and "e's"), and piled high with pillows of freshly whipped cream. Cream pies made with Jello-pudding would taste like old socks next to this one, and seriously aren't that much easier to make. If you make your cream pies with Jello-pudding mix, you are just plain lazy (sorry if I've offended you Jello-pudding fans. I guess it's not your fault that you haven't developed taste buds. It's probably genetic).
Next time you want a Mississippi Mud Pie, put down the Jello-pudding mix, do NOT call Marie Callender's, and instead give this recipe a try! The picture might not look that appetizing, being half eaten and all, but that's only because everyone was too busy devouring to worry about pictures, I swear.
Crust Ingredients (makes 2 crusts unless you tend to eat half of the dough while you cook, like me. You only need one crust for this recipe so freeze the unused dough.)
2.5 c. flour
4T. crisco (vegetable shortening)
pinch of salt
1T. sugar
1.5 sticks of cold cold cold (even frozen) butter
5-6 T. ice water
A bag of beans (for blind baking)
The easiest way to do this is with a food processor. In fact, I won't make pies unless I have a food processor (again, spoiled). Just dump everything except the water in the food processor, and pulse until it forms fine-medium sized crumbs and bits. Then with the food processor running, slowly add the ice water a tablespoon at a time until the dough comes together in a ball. Stop adding water as soon as the dough comes together, or it will be too sticky. You might not use all the water.
Form two equal sized disks with the dough, wrap them in plastic wrap, and stick them in the freezer for 15 minutes, or the fridge for at least 45 minutes. Once the dough has chilled, preheat the oven to 325. Remove the dough from the fridge and roll it out to a size that is a little larger than your pie dish. Dust the rolling surface and the dough with flour as you go to prevent the dough from sticking. Transfer the dough to the pie dish by laying the rolling pin in the center of the dough (dust everything with flour), and folding the dough over the rolling pin on both sides. Lift the rolling pin and put it over the center of the pie dish. Unfold the dough into the pie dish. Don't worry if your crust tears into a bunch of annoying little pieces. Just patch it back together! Remove (eat) the excess dough from the edges.
Because this recipe calls for a custard filling, you must blind bake the dough or it will be soggy and undercooked in the final pie. To blind bake, line the pie dough with parchment paper and pour the beans into the lined crust. Pop the crust in the oven and bake at 325 for about 15-20 minutes, or until the crust is light golden and partially baked. Set aside while you make the filling.
Filling Ingredients
5oz bittersweet chocolate (I used Ghirardelli 60% cocoa chocolate chips)
3.5 T. unsalted butter
2T light corn syrup
6 eggs
1.5 c. packed light brown sugar
1t. vanilla extract
Topping Ingredients
1.5 c. heavy whipping cream
2T. Sugar
Keep the oven at 325. Put the chocolate, butter, and corn syrup in a small saucepan over low heat, and stir continuously until melted and combined. Be really careful not to burn the chocolate, i.e. don't leave the stove and don't stop stirring. Remove from heat and allow to cool slightly. In a large bowl beat the eggs, sugar, and vanilla until well combined. Very slowly drizzle the chocolate mixture into the egg mixture, beating continuously as you drizzle (if instead you pour a big glob into the eggs, the heat from the chocolate will probably curdle them and you will have Mississippi Scrambled Mud Pie). Once all the chocolate has been added, beat until thoroughly combined. Pour the chocolate batter into the crust and bake for 35-40 minutes. The baked pie should be firm to the touch, but should wobble slightly in the center when you shift the pie plate. Let the pie cool completely, then cover and refrigerate overnight.
When you are ready to serve the pie, make the topping. Pour the whipping cream into a medium bowl and whip until soft peaks form. Add 2T granulated sugar, and beat on low speed for a few more seconds to dissolve the sugar. Mound the whipped cream onto the pie, and serve!
Saturday, June 5, 2010
Ice Cream Sandwiches: Peanut Butter Cookies with Honey Ice Cream
Last week, I went on a baking binge. In a span of five days, I baked a mascarpone cheesecake, a Mississippi mud pie, and two kinds of ice-cream to sandwich between two kinds of homemade cookies. I had to throw a party just to get rid of it all! Ok, that's a lie, the party was the excuse for the baking (but baking can be a great excuse for a party!). Miraculously (or perhaps due to my baking prowess?), every dessert went off without a hitch and attained blogworthy levels of deliciousness. Pretty good track record for a total of six recipes (five new and never tested!). I shouldn't gloat though... the universe will undoubtedly punish such pridefulness by causing my next six attempts to burn and curdle. If I've exhausted my baking karma, the following four posts (oozing with chocolate, swimming in whipping cream, extolling the velvet textures of cheesecake and ice cream alike) should suffice until the divine deity of deliciousness warms up to my efforts again.
Let's start with the ice cream sandwiches... in particular, with the peanut butter cookie, honey ice-cream sandwiches. For years, Peanut Butter has cheated on Jelly with Honey (including threesomes with Banana behind Jelly's back!). Jelly's old hat, and this ice-cream sandwich needed something fresh, something special. We're not talking Eskimo pies here, people (worst dessert. Belongs in the same category as the tootsie roll - the cookie portion of the Eskimo pie purports to be chocolate but tastes like "brown"). I wanted a frozen treat to put It's It's, Klondikes, and even Haagen Dazs bars to shame. I wanted an ice-cream sandwich that would seduce you into eating several even if you were too full for a single bite. Peanut butter and jelly-ice-cream sandwich? I don't think so. Gloppy Jelly, tart and mottled with nagging seeds couldn't hold a candle to smooth, golden-sweet Honey. Jelly was toast, and Peanut Butter (cookies) embraced Honey (in a billowing ice-cream gown bedecked with golden toffee-nuts). They lived happily ever after ("until dessert do us part!"). At least, that's the romanticized version...
Both the ice cream and the cookies are fantastic by themselves as well. The honey ice-cream is very rich, and the crunchiness of the toffee-nuts contrasts nicely with the silky cream. I'm not a fan of crunchy cookies, however, so I specifically opted for a recipe that claimed to produce soft ones. The key is to bake the cookies for just the right amount of time - if they start to brown, you've gone too far and they'll be on the crunchy side. A perfectly baked batch of peanut butter cookies will still look a bit like melted balls of dough when you take them out of the oven. Don't worry they'll firm up (without turning crunchy!). Thomas Keller, reigning King of Deliciousness, says that if you want soft cookies you should mist them with water before popping them in the oven, instead of under-baking them. I can't vouch for that method, but go ahead and try it if you're willing to eat crunchy cookies should the mist method go awry.
You may want to start the ice cream a day or two early to give the "batter" plenty of time to chill before you freeze it in your ice-cream maker. Make sure to freeze your ice cream drum ahead of time!
Honey Ice Cream
1 vanilla bean
2c. heavy whipping cream
1c. whole milk
1/2 c. clover honey
1c. toffee peanuts
In a large saucepan, combine the milk, cream, and honey. Slice the vanilla bean in half, carefully scrape the seeds into the pot, and then toss in the whole pod. Stir over medium heat to dissolve the honey, until the cream is scalded (begins to form little bubbles around the edges). Remove from heat and steep, covered, for one hour. Cover and refrigerate until thoroughly chilled (overnight is best). When you're ready to make the ice cream, remove the vanilla pod, stir the mixture to recombine the ingredients, and then pour into an ice-cream maker and proceed according to the ice-cream maker's instructions (usually the mixture churns for about half an hour). After about fifteen minutes, pour the toffee peanuts into the ice-cream machine. Continue churning according to the manufacturer's instructions (another 15 minutes) and then transfer the ice cream to a container and put it in the freezer to firm up (I recommend overnight, but a few hours should do the trick). Meanwhile, make the peanut butter cookies.
Soft Peanut Butter Cookies
1 c. creamy peanut butter (not the oily natural kind)
1c. packed dark brown sugar
1c. white sugar
1c. softened butter
2 eggs
1t. baking soda
1t. baking powder
1t. vanilla
2 1/2 c. flour
Preheat the oven to 350. Cream the butter, peanut butter, and sugars together. Add the eggs one at a time, beating well after each addition. Beat in the vanilla. In a separate bowl, combine the baking powder, baking soda, and flour. Stir the flour mixture into the rest of the batter until completely incorporated. Shape the dough into balls (1 to 1.5 in will give you 40-50 cookies... more than you'll need! The ice cream recipe makes enough to fill about 20 ice cream sandwiches depending on how big you make your cookies, and how thick you want your sandwiches) and roll the balls in sugar. Place the dough-balls on cookie sheets, leaving about 2 inches between each cookie (I never follow this instruction, and my cookies always run together so that I end up with one giant cookie that I have to cut into squares... oh well, squares taste just as good as circles). Use a fork to flatten the cookies by making a crosshatch pattern on each ball. Dip the fork in sugar between each cookie to prevent it from sticking. Bake the cookies for 6-7 minutes (resist the temptation to bake them longer if you want soft cookies!). Let the cookies cool completely before making the sandwiches.
When the cookies are completely cool and firm enough to handle, take the ice cream out of the freezer. If you're ice cream has been chilling overnight, let it sit at room temperature for ten minutes so it will be more pliable. Grab a cookie. Dollop your desired amount of ice cream onto the underside of the cookie and gently press and spread it a bit with the back of a spoon. Top with another cookie and pop the sandwich in the freezer while you repeat the process with the remaining cookies and ice cream. When you run out of ice cream, remove the sandwiches from the freezer and either wrap them individually in plastic wrap, or do like me and toss them in a big Ziploc bag. They will keep in the freezer for a few weeks (probably longer, but mine were eaten before I could test that theory out...). Serve with a more ice cream sandwiches, a cheesecake, a pie, and party!
Up next... Brer Rabbit ice cream sandwiches (Molasses Cookies with Brown Sugar Ice Cream)
Friday, May 21, 2010
Old Fashioned Blueberry Cake
I'm always suspicious of bakeries endorsed as "the best" by celebrities or the general media, and I'm even more suspicious of the subsequent cookbooks published to capitalize on that new-found fame. Case in point: the cupcakes I sampled at Magnolia Bakery, featured in Sex In The City, were some of the driest, blandest cupcakes I've ever eaten, yet everybody raved about them and probably purchased scores of Magnolia Bakery Cookbooks, exacerbating the dry cake epidemic that plagues many bakeries. Thank goodness Sprinkles set the cupcake trend back on track with their moist and fluffy works of cakelet perfection... mmm must try the new salty caramel flavor...
Anyways, when I received the Hummingbird Bakery Cookbook, with a quote from Gwyneth Paltrow on the front touting their cupcakes as "legendary" and claiming her special occasions are "always chock full of Hummingbird goodies," I was immediately skeptical. How do I know Gwyneth Paltrow is a bona fide foodie with trustworthy taste in cupcakes? And how can Hummingbird's cupcakes be "legendary" when the bakery's owner admits that "cupcakes seem to be unknown in London" (Hummingbird opened in London in '04)? Fishy! Or maybe I'm just hyper-logical... law school will do that to you.
No offense to the Brits out there, but as far as I know, the UK isn't exactly renowned for its culinary prowess. If you want a sticky or steamed pudding, sure, but can a British bakery turn out a moist cake without covering it with custard, dousing it with sugar-syrup, or baking it in a steam bath? Why, yes, in fact it can.
Despite my misgivings, I was seduced by the mouth-watering photographs in the Hummingbird Bakery Cookbook, and embarked on the Blueberry Cake, pictured with frosting but claiming to be "moist enough to be served without the frosting, if you prefer." I do not prefer frostingless cake, but I demand moist cake! And so I commenced baking. The recipe proceeded a bit oddly, and I've altered the steps for a smoother baking process, but nonethless my cake baked up beautifully- heavy, fragrant, and practically oozing moisture. The frosting recipe likewise proceeded in a strange and backwards manner (Oh those Brits!), but produced a cream cheese frosting so light and fluffy that people proclaimed that it must be made of marshmallows! Not so! The towering, blueberry-bespeckled confection was a sight to behold... But I was unprepared for the first bite...
Perhaps in the UK, people don't consume pounds of sugar every day, and so are accustomed to mild cake. Still slightly warm from the oven, with a crumbly yet moist crumb, the cake at first seemed like a success. As I forked it into my mouth, however, I couldn't help but furrow my brow... it was...somewhat bland, and had an odd baking-powder bitterness like an undercooked pancake. The frosting was spectacular, but I was horrified to serve bland cake. I held my breath and hoped the clouds of frosting would woo my guests into overlooking the cake's pancakish tastelessness. No one complained, but I took the Hummingbird Bakery Cookbook and banished it to the back of my bookshelf with a disgruntled shove. But the story doesn't end there...
Although I had vowed not to eat another bite of the disappointing dessert, I succumbed to the sight if its silky frosting and toothsome interior the next morning... and was amazed!!! Overnight, the baking-soda bitterness had dissipated, the cake had softened, and its mild, muffiny flavor paired perfectly with the oh-so-sweet frosting. It was like the cake-fairy had come in the night and magically transformed the ugly cakling into the graceful swan of sweets! I've devoured about half of the cake on my own since that moment, and I'm already planning my next baking adventure from the Hummingbird Bakery Cookbook.
While I definitely warmed up to this recipe, I must note that you should be prepared for its unusually mild, almost elegant, not-so-sweet flavor. It's reminiscent of cakes I imagine someone's grandmother might have baked (hence the "old-fashioned" moniker). I recommend baking it the night before you plan to serve it, because the flavor undeniably improved overnight.
Cake Ingredients
3 sticks unsalted butter, room temperature
1 3/4 c. sugar
6 eggs
1t. vanilla
3 1/2 c. flour
2T plus 2t. baking powder (make sure it hasn't expired!)
1c. sour cream
3T. whole milk
2 pints fresh blueberries (some will be used for decorating)
Frosting Ingredients
4 2/3 c. powdered sugar
1 stick unsalted butter, softened
8oz cold cream cheese
Prepare the cake:
Preheat the oven to 325. Butter a 10-in ring mold (or angel-food cake pan if you don't have a ring-mold... who has a ring mold??) and lightly dust it with flour. Cream the butter and sugar until light and fluffy. Add the eggs one at a time, beating well and scraping down the sides of the bowl after each addition. Beat in the vanilla. In a separate bowl, combine the flour and baking powder. Beat in the flour mixture in 3 additions, alternating with the sour cream (starting and ending with the flour mixture). Stir in 1 1/2 pints of blueberries (reserving the other half-pint for decoration). Pour the batter into the prepared pan, and bake until golden brown. The recipe claimed this would take 40 minutes, but my brand-new, perfectly calibrated oven took an hour to bake this puppy up. Check the cake after 40 minutes, but if it's barely browning, and a knife inserted comes out gooey, put it back in and check every 10 minutes until the knife comes out clean and the cake is golden. Once you're satisfied with the cake's doneness, allow it to cool in the pan for about 15 minutes before turning it out to finish cooling completely on your wire rack, or cake stand. When you're nearly ready to frost the cooled cake, make the frosting.
Note: I edited both the cake and frosting steps for a smoother baking process.
Beat the softened butter and cold cream cheese until fluffy and well-mixed. With the mixer on low, beat in the powder sugar in four additions (you could add it all at once, but a billowing cloud of powdered sugar will surely coat you and your kitchen in a fine layer of sugar-dust). When all of the ingredients have been incorporated, turn the mixer to medium-high and continue beating the frosting until fluffified, at least five minutes (this is where having a stand-mixer comes in handy). According to the book, you should not overbeat the frosting or it will begin to weep, but it should be fine if you stick to the five-minute rule.
Slather the big 'ole cake with gobs of frosting, covering the top, sides, and center with as many thick, rich layers as it can hold. Dot the top with the remaining half-pint of blueberries, and to really gild the lily, garnish the cake with a final sprinkle of powdered sugar. SERVE THE NEXT DAY for maximum deliciousness! Unless you don't mind the flavor of baking powder...
Sunday, May 16, 2010
Poppyseed Lemonade Cupcakes
Raise your hand if you suffered through a very long, very painful, calorie-busting hour of "Skinny Jeans" and then promptly donned sweatpants and consumed twice as many calories in cupcake batter and cream cheese frosting as you burned doing squats to Poker Face. Proof that exercise actually causes weight gain! Luckily, I think the hedonistic pleasure of stuffing these scrumptious cupcakes into my cheeks more than compensated for my wasted workout.
I normally consider baking from a box to be a form of cheating, but I like to bend the rules when it comes to cake mixes because they make damn good cakes. And if I doctor the mix, it basically counts as a scratch cake!
These cupcakes were especially satisfying because I made them entirely out of ingredients I had on hand. An old bag of poppy seeds, the sad little half-package of cream cheese in the fridge, and a redolent lemon that had tumbled into the grass from its perch on the lemon bush combined with pantry staples and a cake mix to make a batch of fluffy, citrusy, springtime treats. These would be really cute if you topped them with sugared lavender or rose petals, but even I'm not crazy enough to have those on hand! Although, I do have roses in my garden, and the recipe for sugared blossoms committed to memory... but I wanted instant, workout-negating, my-ass-will-hurt-for-the-next-three-days-so-I-deserve-it, gratification. That's why I love cake mixes! So easy, so yummy, so EVIL...
Cupcake Ingredients
1 butter recipe golden cake mix (butter recipe is always better because butter is always better)
The things the cake mix tells you to use (probably a stick of butter and two or three eggs - check the box)
1 LARGE lemon (mine was the size of a softball, no joke)
2t. poppy seeds, plus extra for decorating
Frosting Ingredients
4oz cream cheese
1 stick of butter, softened
3c. powdered sugar
1t. vanilla
To make the cupcakes, follow the cake mix directions for preheating the oven, and prepare your muffin tins by either lightly buttering each muffin-well, or filling the tins with cupcake wrappers. Obviously in my lazy state I went with the latter. Zest and juice the lemon. Check to see how much water your cake mix requires. Pour the lemon juice into a liquid measuring cup, and then add water until you have the amount of liquid specified by the cake mix directions. In a medium bowl, combine the lemon-water with the cake mix, the other ingredients called for by the mix (e.g., butter and eggs), and the zest of the lemon. Add the poppy seeds and beat on low speed until thoroughly mixed. Pour the batter into the prepared pans and bake for the time specified on the cake mix box (aaah this recipe is such a cop-out... but it's goooood). The cake is done cooking when a toothpick inserted into the center of a cupcake comes out clean.
While the cupcakes bake, make the frosting. Beat the cream cheese and butter together until light and fluffy. Add the powdered sugar half a cup at a time (adding it little by little will prevent a cloud of powdered sugar dust from erupting over your kitchen), mixing slowly and thoroughly after each addition. Mix in the vanilla.
When the cupcakes have cooled completely, frost with the cream cheese frosting, and sprinkle with poppy seeds (or sugar encrusted rose petals...). Eat cupcakes as needed with a glass of milk to mitigate muscle pain caused by Skinny Jeans workouts. Doctor's orders.
Not much of a sweet tooth? Check out Evil Batch's new savory-sister blog, Wicked Lickens, jointly edited by me and my beau. First up, bacon-salmon sandwiches!
Thursday, May 13, 2010
Strawberry Ice Cream
As of late, my poor ice cream maker has languished amongst my random and rarely-used kitchen appliances (fondue pot, pressure cooker, cannoli tubes, giant cast iron dutch oven...). This was mostly due to the fact that my freezer was stuffed to the brim with God-knows-what (the freezer was full when I moved into my last apartment, but the roommates denied ownership of most the contents... maybe we had our very own freezer time capsule memorializing the diets of the previous owners!). No freezer space means no space for the absurdly large and heavy ice cream drum that needs to freeze overnight prior to ice-creaming. So, summers have come and gone over the past three years, sans home-made ice cream. But I will be ice-creamless no more!
After moving into my spanking-new cottage a few days ago (complete with a big, sparkling clean, EMPTY refrigerator and freezer!!!), homemade ice cream was at the top of my priority list (seriously, as in right after unpacking my ice cream maker, and before unpacking all of my clothing).
I normally opt for non-fruit desserts (mmmmm chocolate....), but now that it's spring (and the strawberries and peaches aren't being shipped from Venezuela or wherever) it's pretty hard to resist the shiny, fat apples, fragrant, fuzzy peaches, and giant jewel strawberries in the produce section. Hence the strawberry ice cream! This custard-style recipe contains a lot of fat, which promotes aeration and produces a luscious, creamy (almost fluffy!) ice cream. The strawberries are finely chopped rather than pureed to lend a pale pink hue and light strawberry flavor to the finished treat, with every mouthful punctuated by vibrant, tangy bits of fruit.
As a bonus, the cooked custard that forms the ice cream base (minus the strawberries) can double as a wonderful creme anglaise - just halve the ingredient quantities, omit the lemon and replace it with 1t. vanilla (or use a the seeds of a vanilla bean if you want to get fancy... and expensive...), and proceed as directed. Once the creme anglaise has cooled, add chocolate cake!
But I digress... (thoughts of chocolate tend to do that) back to the ice cream!
Ingredients
1 pint fresh strawberries
1T. fresh lemon juice
2 large eggs
1c. sugar
1c. whole milk
2c. heavy whipping cream
If you are using an ice cream maker with a drum that must be frozen in advance, make sure it's frozen!
In a large saucepan, combine the cream, milk, lemon juice, and 1/2c. sugar. Heat on low until scalded (little bubbles will start to form at the edges, but do NOT let it boil!). While the cream mixture heats, beat the eggs with 1/4c. sugar until well combined.
When the cream mixture reaches scalding temp., temper the egg mixture. The eggs must be tempered, i.e., slowly brought up to the temperature of the cream, before they are added or the cold eggs will scramble when they hit the hot cream, and I'm pretty sure scrambled-egg ice cream won't be as delicious as strawberry. To temper the eggs, whisk them continuously while slowly drizzling in a thin stream of hot cream. I usually whisk with one hand, and ladle with the other, but you can also enlist a helper to either whisk or ladle. Keep whisking and ladling until you've added about half the cream mixture to the eggs, and they are hot to the touch. At this point, you can safely add everything back into the sauce pan, but you're not out of the woods yet!!! The mixture still needs to be heated until it reaches that velvety, custard consistency. Keep the heat on low, and stir constantly until the mixture thickens slightly (supposedly this happens around 170, but I only had a meat thermometer and it probably wasn't very accurate in custard so I stopped cooking mine when the thermometer said 160).
It is very, very important to stir constantly, and not leave the custard unattended even for five seconds while you search for your candy/meat thermometer. It will curdle (i.e. the eggs will scramble). Don't feel bad if your eggs scramble, but don't bother trying to resuscitate curdled custard. I promise you it will be disgusting. Just bite the bullet, and throw the lumpy mess out. Yes, I did curdle my eggs (thanks to my five-second thermometer hunt), and yes I threw the entire thing down the drain and started over (it might be a good idea to have some extra ingredients on hand if you're a custard newbie). The second time went smoothly though! (literally, haha). When your custard thickens, remove it from the heat and pour it into a metal bowl. Cool completely, either by refrigerating, or by placing the metal bowl in a bigger bowl filled with ice and stirring the custard to chill it (this speeds up the cooling process, which otherwise takes about 2 hours).
While the custard chills, remove the stems from the strawberries, and chop finely. Combine the chopped/crushed berries with the remaining 1/4c. sugar in a small bowl, and refrigerate until the custard is cooled.
When your custard is cold, stir in the berry mixture, and pour the entire mixture into your ice cream maker. Let the directions for the ice cream maker take you from here! (usually it freezes for about 30 minutes in the ice cream maker, and the resulting ice cream is very soft. I like to pack it in tupperware, and freeze it again overnight for the familiar, solid texture).
Serve with chocolate sauce (what else? ha.)
Subscribe to:
Posts (Atom)